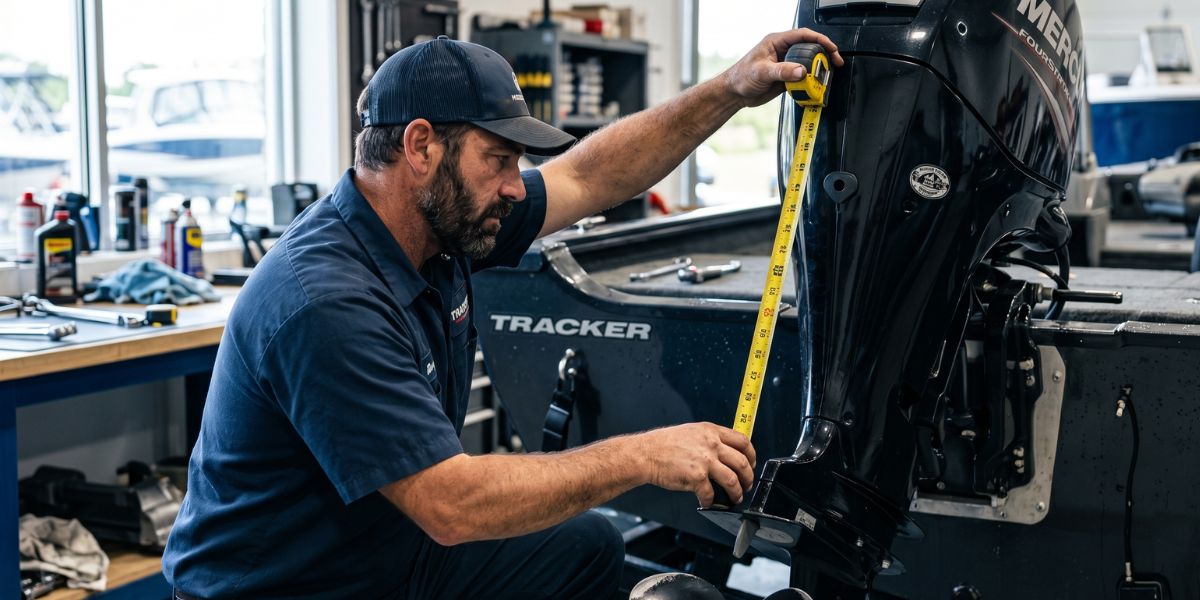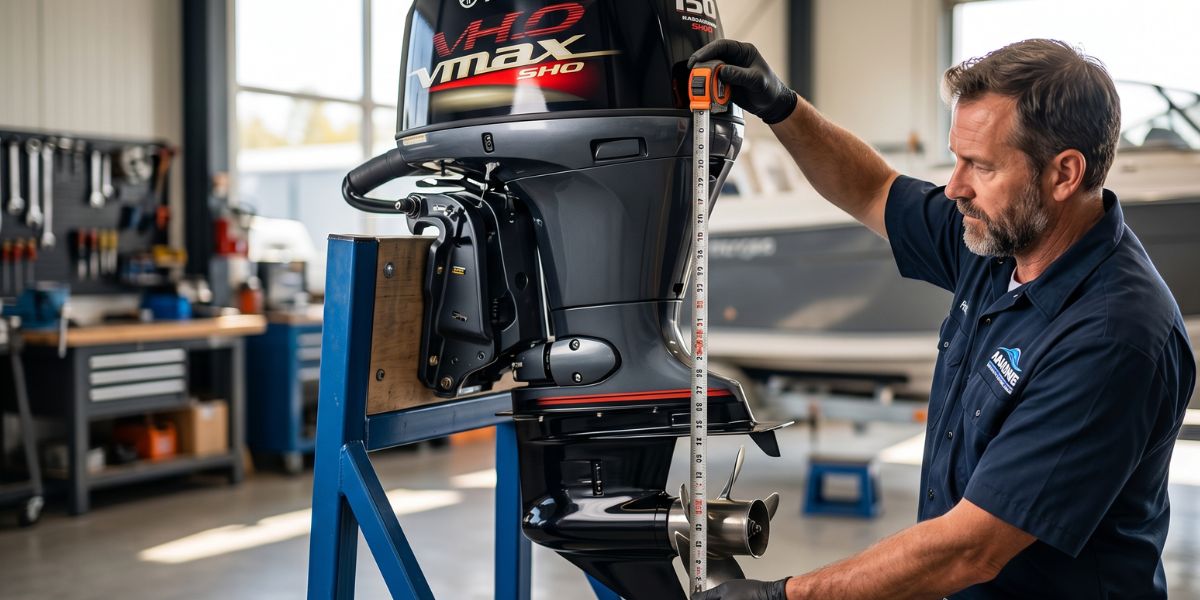
Knowing how to winterize a 4 stroke outboard motor is one of the most important skills a boat owner can learn. When boating season comes to an end, your outboard motor needs proper care before it sits unused for several months. Winterization helps protect the engine from cold weather, moisture, corrosion, and fuel-related issues that can develop during long-term storage.
Many boat owners spend thousands of dollars on a quality outboard motor, yet some overlook the importance of preparing it for winter. Unfortunately, skipping this step can lead to costly repairs, poor engine performance, and frustrating startup problems when spring arrives. A few hours spent winterizing your motor can save both time and money in the future.
Proper off-season storage offers several benefits. It helps maintain engine reliability, protects internal components, reduces corrosion, and extends the overall lifespan of the motor. It also gives you peace of mind knowing your investment is protected during the cold months.
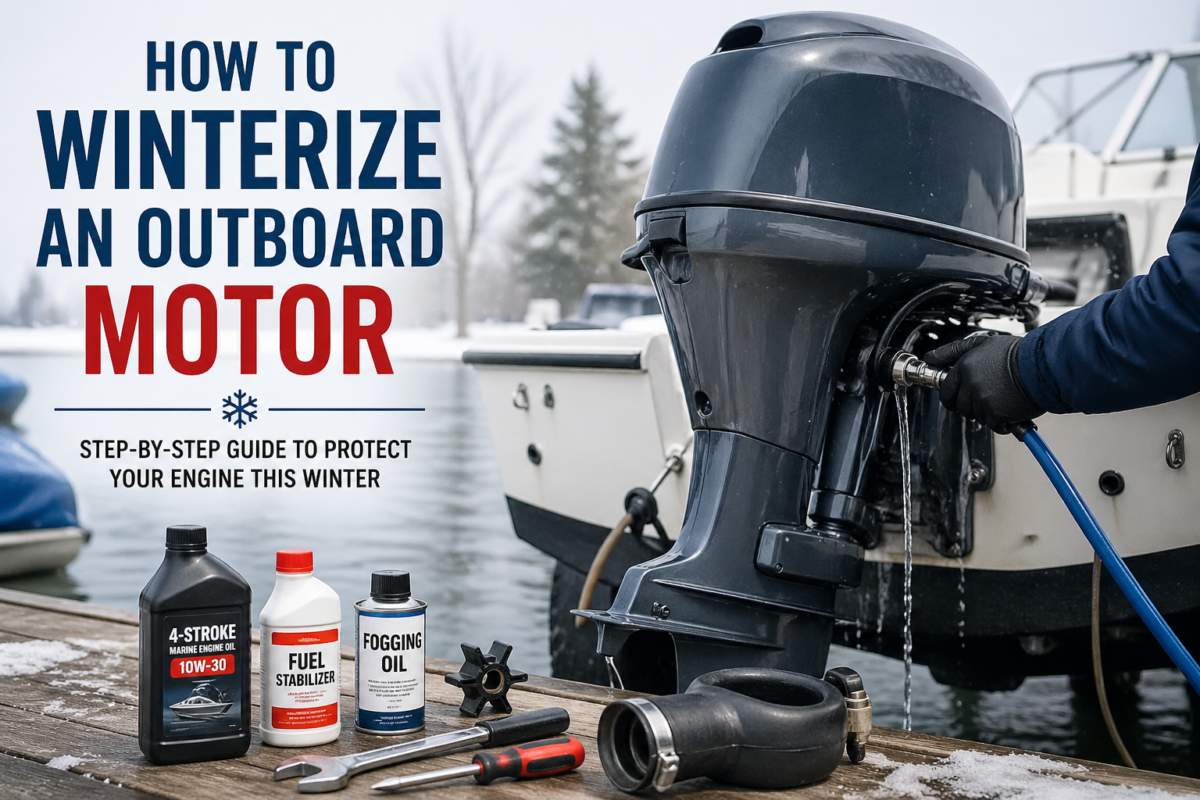
The winterization process typically includes flushing the cooling system, treating the fuel, changing engine oil, inspecting filters, lubricating moving parts, protecting against corrosion, and storing the motor correctly. While the process may seem complicated at first, most boat owners can complete it with basic tools and supplies.
By understanding the importance of winterization and following the correct steps, you can ensure your 4-stroke outboard motor remains in excellent condition and is ready to perform when the next boating season begins.
What Does It Mean to Winterize a 4 Stroke Outboard Motor?
Winterizing a 4-stroke outboard motor means preparing the engine for extended storage during the winter months or any long period of inactivity. The goal is to protect the motor from damage caused by cold temperatures, moisture buildup, fuel deterioration, and corrosion.
Marine engines operate in harsh environments. They are constantly exposed to water, humidity, and changing temperatures. When an outboard motor sits unused for weeks or months, these conditions can cause several problems. Fuel can break down and create deposits in the fuel system. Moisture can accumulate inside engine components. Corrosion can develop on metal parts, especially if the boat is used in saltwater.
Cold weather can also affect marine engines in ways that many people do not realize. Water trapped in certain areas can freeze and expand, potentially damaging sensitive components. Batteries can lose their charge during storage, and lubricants may become contaminated over time.
It is important to understand that winterization is different from routine maintenance. Regular maintenance focuses on keeping the engine running efficiently throughout the boating season. Tasks such as checking oil levels, replacing spark plugs, and inspecting fuel filters are part of standard maintenance. Winterization, however, is specifically designed to protect the motor during long periods when it will not be used.
Four-stroke outboard motors require special attention because they contain an internal lubrication system similar to an automobile engine. Engine oil must be changed AMS Performance Short Block Engines ALP.07.04.0002 regularly, and internal components need protection from contaminants that may remain in used oil. Proper fuel treatment and lubrication are also essential for preventing issues that can develop during storage.
Taking the time to winterize your engine correctly helps maintain performance, reduces wear, and ensures the motor is ready for use when warmer weather returns.
When Should You Winterize Your 4 Stroke Outboard Motor?
Timing is an important part of successful winterization. Ideally, you should winterize your 4-stroke outboard motor immediately after your final boating trip of the season. Waiting too long can expose the engine to freezing temperatures and increase the risk of damage.
The best time to winterize is before temperatures consistently drop below freezing. This allows you to complete the process in comfortable working conditions and ensures the engine is protected before winter weather arrives. Boat owners in northern regions often perform winterization in late fall, while those in warmer climates may do so later in the year.
Several signs can indicate that it is time to prepare your motor for storage. Shorter days, colder temperatures, fewer boating opportunities, and the end of local boating how to winterize outboard motor activities are common indicators that the season is coming to a close. If you know you will not be using the boat for several months, winterization should be completed as soon as possible.
Regional climate conditions also play a role. In areas with harsh winters and freezing temperatures, winterization is absolutely essential. In milder climates, some boaters may continue using their vessels throughout the year. However, even in warmer regions, engines that will remain unused for an extended period should still be winterized to prevent fuel degradation and corrosion.
Many marine professionals recommend winterizing the motor shortly after the final trip rather than waiting several weeks. This approach allows you to flush contaminants, stabilize fuel, and protect engine components while everything is still fresh from use.
Planning ahead can help avoid last-minute maintenance and ensure your motor remains protected throughout the off-season.
Tools and Supplies Needed for Winterization
Having the proper tools and supplies ready before you begin makes the winterization process easier and more effective. Using high-quality marine products can also help provide better protection for your outboard motor during storage.
One of the most important items is fresh engine oil and a replacement oil filter. Four-stroke outboard motors rely on clean oil to lubricate internal components. Changing the oil before storage removes contaminants and moisture that may have accumulated during the boating season.
A fuel stabilizer is another essential supply. Gasoline can deteriorate over time, especially when stored for several months. Adding a stabilizer helps preserve fuel quality and prevents harmful deposits from forming inside the fuel system.
Marine grease should also be included in your winterization kit. It helps protect steering components, pivot points, and other moving parts from corrosion and wear during storage.
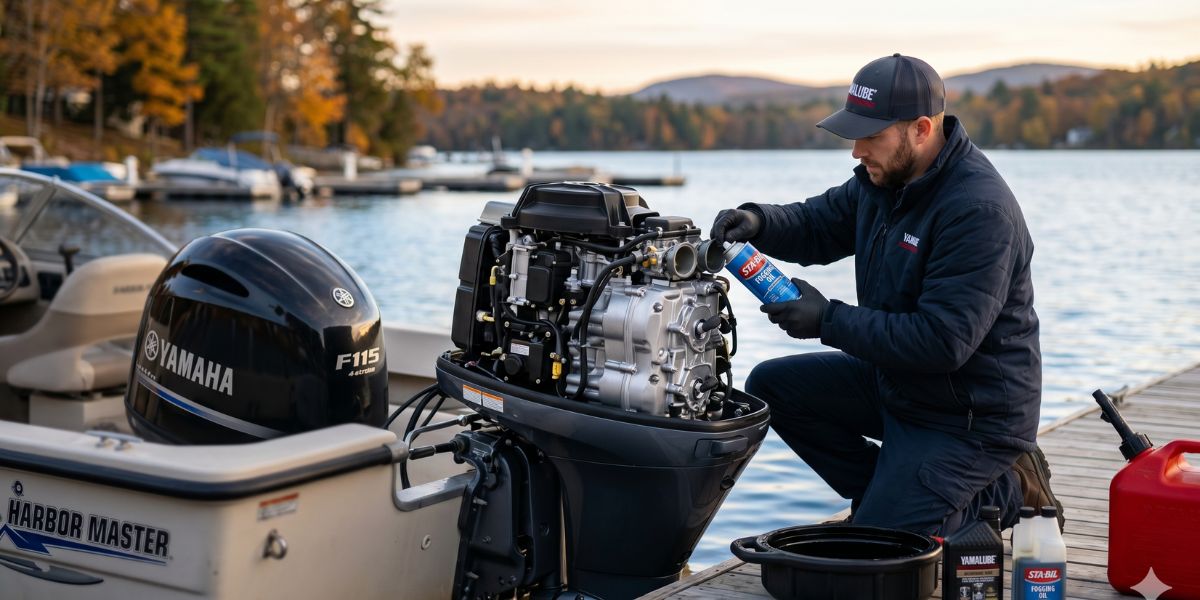
Some manufacturers recommend using fogging oil for additional protection. Fogging oil coats internal engine surfaces and helps prevent rust formation while the motor is not in use. Always consult your owner’s manual to determine whether fogging oil is appropriate for your specific engine model.
Lower unit gear lubricant is necessary for servicing the gear case. Replacing old lubricant helps ensure gears and bearings remain protected throughout the winter months.
A freshwater flushing kit is particularly important for boat owners who operate in saltwater. Flushing removes salt deposits, sand, and debris that could contribute to corrosion if left inside the cooling system.
Basic hand tools such as screwdrivers, wrenches, pliers, and socket sets will help you complete various maintenance tasks. Keeping these tools organized before starting can save time and frustration.
Finally, cleaning supplies such as microfiber cloths, marine-safe cleaners, and corrosion inhibitors help keep the motor clean and protected. A clean engine is easier to inspect and less likely to develop corrosion problems during storage.
By gathering all necessary supplies beforehand, you can complete the winterization process efficiently and give your 4-stroke outboard motor the protection it needs for the months ahead.
Step-by-Step Guide to Winterizing a 4 Stroke Outboard Motor
Winterizing a 4-stroke outboard motor may seem like a complicated task, but breaking it down into simple steps makes the process much easier. Proper winterization helps protect your engine from corrosion, fuel problems, moisture damage, and costly repairs. By following these steps, you can ensure your outboard motor remains in excellent condition throughout the off-season.
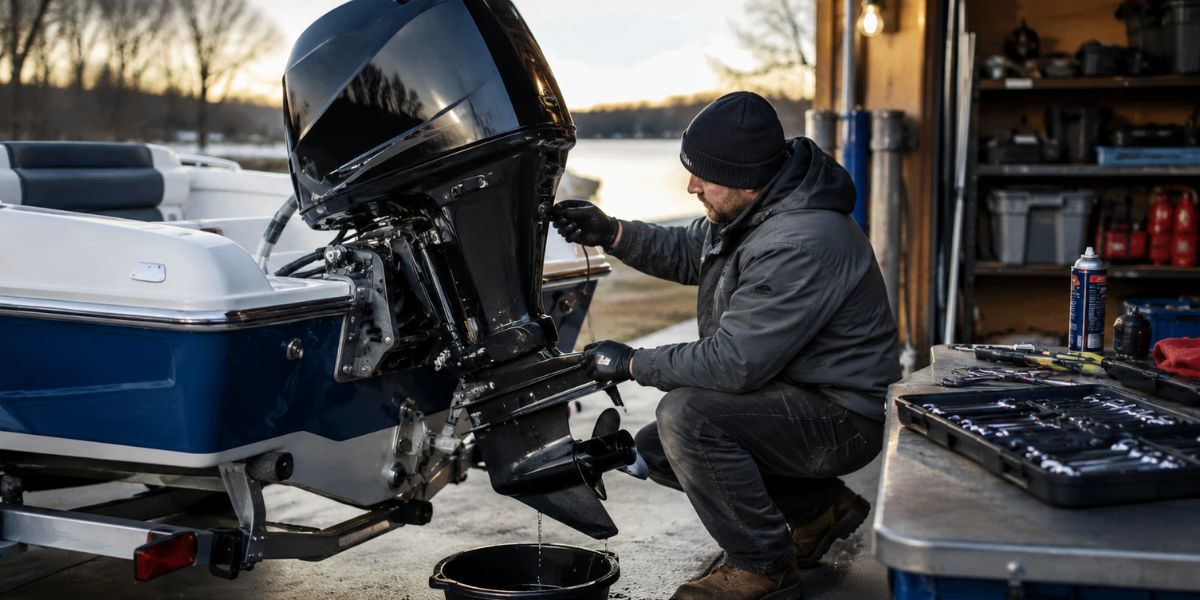
Step 1 – Flush the Engine with Fresh Water
The first step is to flush the engine thoroughly with fresh water. This is especially important if you boat in saltwater. Salt, sand, dirt, and debris can accumulate inside the cooling passages and cause corrosion if left untreated.
Most outboard motors can be flushed using flushing muffs attached to a garden hose or through a built-in flushing port. Follow the manufacturer’s instructions for your specific engine model. Run fresh water through the system for approximately 10 to 15 minutes to ensure all contaminants are removed.
A proper flush helps maintain cooling system efficiency and reduces the risk of corrosion during storage.
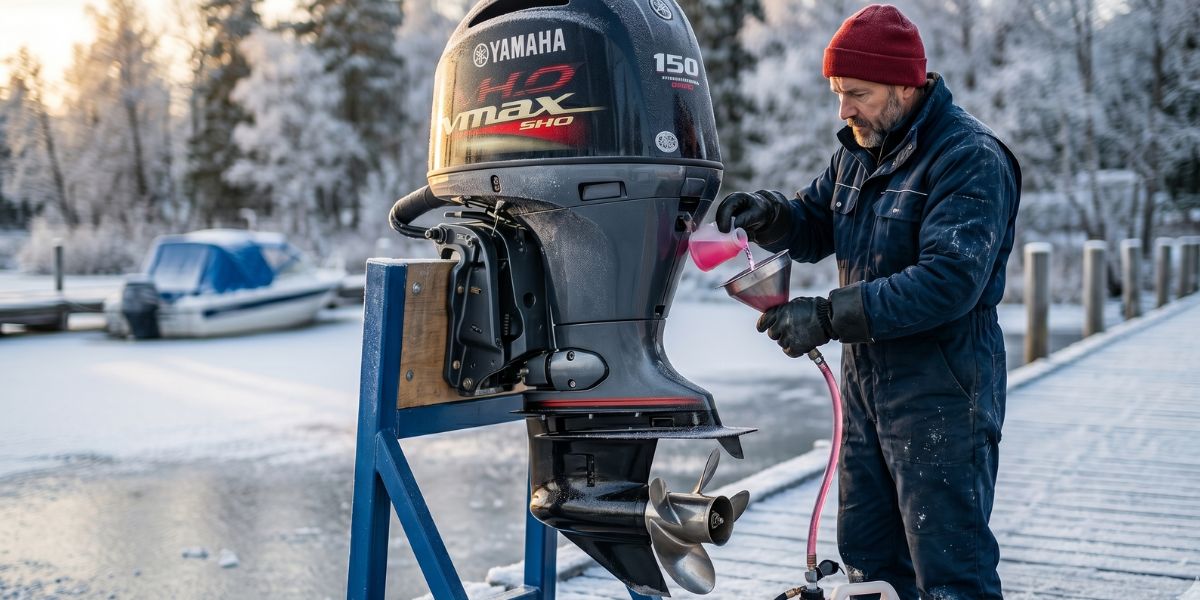
Step 2 – Add Fuel Stabilizer
Fuel begins to deteriorate when it sits unused for extended periods. Over time, gasoline can form deposits that clog fuel injectors, fuel lines, and carburetor components.
Adding a marine-grade fuel stabilizer helps preserve fuel quality throughout the winter months. Follow the dosage instructions listed on the stabilizer product. Most products require a specific amount based on the size of the fuel tank.
After adding the stabilizer, run the engine for several minutes. This allows the treated fuel to circulate throughout the entire fuel system, ensuring every component receives protection before storage.
Step 3 – Change the Engine Oil and Filter
Fresh oil is essential for protecting the internal components of a 4-stroke outboard motor. Used oil contains contaminants, moisture, and combustion byproducts that can cause corrosion when left inside the engine for months.
Begin by warming the engine slightly to improve oil flow. Drain the old oil completely and remove the old oil filter. Install a new filter and refill the engine with the manufacturer-recommended oil.
Changing the oil before winter storage helps protect bearings, pistons, and other critical engine parts from damage during long periods of inactivity.
Step 4 – Inspect and Replace the Fuel Filter
The fuel filter plays an important role in keeping contaminants out of the fuel system. During winterization, inspect the filter carefully for signs of dirt, water, or restricted flow.
Common signs of a clogged fuel filter include poor engine performance, hard starting, rough idling, and reduced fuel efficiency. If the filter appears dirty or has reached its recommended service interval, replace it before storing the motor.
Installing a new fuel filter helps ensure a smoother startup and reliable performance when boating season returns.
Step 5 – Change Lower Unit Gear Oil
The lower unit contains gears and bearings that require clean lubricant for proper protection. Changing the lower unit gear oil is an important winterization task that should not be overlooked.
Drain the old lubricant and inspect it carefully. Milky-colored gear oil often indicates water contamination, which may signal a damaged seal. Metal particles may indicate excessive gear wear.
Refill the lower unit with fresh marine-grade gear lubricant recommended by the manufacturer. Fresh lubricant helps prevent gearcase damage and provides protection throughout the storage period.
Step 6 – Lubricate Moving Parts
Marine environments can be harsh on metal components. Applying marine grease to moving parts helps prevent corrosion and keeps components operating smoothly.
Focus on areas such as:
- Steering components
- Pivot points
- Throttle linkages
- Shift mechanisms
- Tilt and trim points
Use a high-quality marine grease designed to withstand moisture and saltwater exposure. Proper lubrication reduces wear and helps prevent seized components after months of storage.
Step 7 – Inspect the Propeller
The propeller should be removed and inspected as part of the winterization process. Many boat owners are surprised to find fishing line, weeds, or other debris wrapped around the propeller shaft.
Remove any debris and inspect the propeller for cracks, bends, chips, or corrosion. Damage that goes unnoticed can affect performance and cause vibration during operation.
Before reinstalling the propeller, apply marine grease to the propeller shaft. This helps prevent corrosion and makes future propeller removal easier.
Step 8 – Check the Battery
Battery maintenance is often overlooked during winter storage. A neglected battery can lose its charge and suffer permanent damage.
Start by cleaning the battery terminals and removing any corrosion. Check cable connections and ensure they are secure. Fully recharge the battery before storage.
For best results, store the battery in a cool, dry location and use a maintenance charger if recommended. Keeping the battery fully charged can significantly extend its lifespan and improve spring startup reliability.
Step 9 – Protect Against Corrosion
Corrosion is one of the biggest threats to any marine engine, particularly those used in saltwater environments.
Inspect the motor for exposed metal surfaces, electrical connections, fasteners, and linkage components that may be vulnerable to rust and corrosion. Apply a marine anti-corrosion spray or protective coating according to product instructions.
Saltwater boaters should pay extra attention to corrosion prevention because salt residue can continue causing damage even while the motor is in storage. Proper protection helps preserve the appearance and functionality of the engine.
Step 10 – Store the Motor Properly
Correct storage is the final step in the winterization process. Most manufacturers recommend storing the outboard motor in a vertical position. This allows any remaining water to drain completely and prevents moisture from becoming trapped inside the engine.
Whenever possible, store the boat and motor indoors in a dry, protected environment. Indoor storage provides the best protection from snow, ice, sunlight, and temperature fluctuations.
If outdoor storage is necessary, invest in a high-quality motor cover that allows ventilation while protecting the engine from weather exposure. Avoid airtight covers that can trap moisture and encourage corrosion.
Common Winterization Mistakes to Avoid
Even experienced boat owners can make mistakes during winterization. Avoiding these common errors can save money and prevent unnecessary repairs.
One of the most common mistakes is skipping fuel stabilization. Untreated fuel can break down and create deposits throughout the fuel system.
Another mistake is leaving old engine oil in the motor. Used oil contains contaminants that may cause internal corrosion during storage.
Many boat owners also ignore lower unit maintenance. Water-contaminated gear oil can lead to serious gearcase problems if not addressed before winter.
Improper storage position is another issue. Storing the motor incorrectly can prevent proper drainage and increase the risk of moisture-related damage.
Finally, forgetting battery care can result in a dead or damaged battery when spring arrives. Taking a few extra minutes to maintain the battery can prevent costly replacement expenses.
How Long Does It Take to Winterize a 4 Stroke Outboard Motor?
For most boat owners, winterizing a 4-stroke outboard motor takes between two and four hours. The exact time depends on the size of the engine, its condition, and your level of experience.
Smaller outboard motors generally require less time, while larger high-horsepower models may involve additional maintenance tasks.
Other factors that affect duration include changing filters, servicing the lower unit, battery maintenance, and corrosion protection treatments.
Many boat owners choose the DIY approach because it saves money and helps them become more familiar with their engine. However, professional marine technicians can complete the process efficiently and may identify maintenance issues that could otherwise go unnoticed.
Whether you choose professional service or handle the work yourself, investing the time to winterize your outboard motor properly is one of the best ways to protect your marine investment and ensure reliable performance for years to come.
Benefits of Winterizing Your Outboard Motor
Winterizing your outboard motor is one of the smartest maintenance tasks you can perform as a boat owner. While the process requires a small investment of time and money, the long-term benefits far outweigh the effort. Proper winterization protects your engine during months of inactivity and helps ensure reliable performance when boating season returns.
One of the biggest advantages is preventing freezing damage. Water trapped in cooling passages, hoses, or other engine components can freeze and expand when temperatures drop below freezing. This expansion can crack parts, damage seals, and lead to expensive repairs. Winterization helps eliminate these risks by ensuring the engine is properly drained and protected.
Another major benefit is extending the lifespan of your engine. Marine outboard motors represent a significant investment, and proper seasonal Shaft Length on Outboard Motor maintenance helps protect that investment. Fresh oil, clean fuel, proper lubrication, and corrosion protection reduce wear on internal components and help the engine last longer.
Winterization can also significantly reduce repair costs. Many springtime engine problems result from neglected winter storage. Fuel system issues, corrosion, damaged seals, and battery failures often occur when engines are not properly prepared for storage. Addressing these concerns before winter arrives can save hundreds or even thousands of dollars in future repairs.
Improved spring startup reliability is another important benefit. Boat owners who winterize their motors correctly typically experience easier starts, smoother engine operation, and fewer maintenance surprises when they return to the water. Instead of troubleshooting fuel or battery issues, they can focus on enjoying their first boating trip of the season.
Finally, winterization helps maintain resale value. Prospective buyers often ask about maintenance history when purchasing a used boat or outboard motor. A documented history of annual winterization demonstrates responsible ownership and can increase buyer confidence. Well-maintained engines generally command higher resale prices and attract more interest in the marketplace.
DIY vs Professional Winterization
Many boat owners wonder whether they should winterize their outboard motor themselves or hire a professional marine technician. Both options have advantages and disadvantages, and the right choice depends on your experience, budget, and comfort level with marine maintenance.
Cost Comparison
Cost is often the biggest factor. DIY winterization is generally more affordable. Most boat owners spend between $30 and $150 on supplies such as oil, filters, fuel stabilizer, gear lubricant, and corrosion protection products.
Professional winterization services typically range from $150 to $500 or more, depending on the engine size, location, and level of service provided. Larger outboards and premium service packages may cost even more.
Skill Level Required
Basic winterization tasks can often be completed by boat owners with moderate mechanical skills. Following the owner’s manual and using the proper tools can make the process straightforward.
However, some maintenance procedures require greater technical knowledge. Tasks such as diagnosing water contamination in the lower unit, identifying worn seals, or troubleshooting fuel system issues may be more challenging for inexperienced owners.
When to Hire a Marine Technician
Hiring a professional may be the best option if:
- You are unfamiliar with outboard maintenance.
- Your engine requires specialized service.
- The motor has experienced performance issues.
- You do not have the proper tools.
- The manufacturer’s warranty requires professional servicing.
A qualified marine technician can identify potential problems before they become major repairs and ensure all maintenance procedures are completed correctly.
Pros and Cons of DIY Winterization
Pros:
- Lower overall cost
- Greater familiarity with your engine
- Flexible scheduling
- Satisfaction of performing maintenance yourself
Cons:
- Requires time and effort
- Possibility of mistakes
- Need for tools and supplies
- May miss hidden issues
Pros and Cons of Professional Winterization
Pros:
- Expert service
- Thorough inspection
- Professional equipment
- Reduced risk of maintenance errors
Cons:
- Higher cost
- Scheduling delays during busy seasons
- Less hands-on knowledge of your motor
For many boat owners, a combination approach works well. Routine winterization can be performed at home while periodic professional inspections help ensure long-term engine health.
Spring Startup Checklist After Winter Storage
When winter ends and boating season returns, it is important to perform a thorough inspection before launching your boat. Even a properly winterized outboard motor should be checked carefully before use.
Battery Installation
If the battery was removed during storage, reinstall it according to the manufacturer’s instructions. Ensure all terminals are clean and securely connected. Check the battery charge level and verify that it is capable of holding a full charge.
Fluid Inspection
Inspect all engine fluids before starting the motor. Check engine oil levels and look for signs of contamination. Examine lower unit gear oil if applicable and verify that no leaks are present.
Fluids play a critical role in protecting engine components, so addressing any issues before operation is essential.
Fuel System Check
Inspect fuel lines, fuel filters, connectors, and the fuel tank for signs of damage or deterioration. Look for cracks, leaks, or loose fittings.
If fuel was stabilized correctly during winter storage, it should still be usable. However, if fuel quality appears questionable, replacing it may be the safest option.
Engine Testing
Before heading to the water, start the engine and allow it to run according to manufacturer recommendations. Listen for unusual sounds and monitor engine operation carefully.
Check:
- Cooling water flow
- Idle quality
- Warning indicators
- Fuel system performance
- Charging system operation
Early testing allows you to identify and address potential issues before they interrupt your boating plans.
Safety Inspection Before Launching
A complete safety inspection should always be performed before launching your boat.
Verify that:
- Navigation lights work properly
- Safety equipment is onboard
- Steering operates smoothly
- Controls function correctly
- Fire extinguishers are accessible
- Registration and documentation are current
Taking a few extra minutes to inspect your boat can help ensure a safe and enjoyable boating season.
Conclusion
Learning how to winterize a 4 stroke outboard motor is one of the most valuable maintenance skills any boat owner can develop. Proper winterization protects your engine from freezing temperatures, fuel degradation, corrosion, and unnecessary wear during long periods of storage.
The key steps include flushing the engine with fresh water, adding fuel stabilizer, changing engine oil and filters, replacing lower unit gear lubricant, lubricating moving components, inspecting the propeller, maintaining the battery, protecting against corrosion, and storing the motor correctly.
Annual winterization is an essential part of responsible boat ownership. Consistent maintenance not only improves engine reliability but also helps extend the life of your investment and reduce long-term repair costs.
Do not wait until freezing temperatures arrive. Preparing your outboard motor before winter weather begins provides the best protection and ensures a smoother transition into the next boating season.
With proper care and attention, your 4-stroke outboard motor can continue delivering dependable performance for many years to come.
FAQs
How do you winterize a 4 stroke outboard motor?
Winterizing a 4-stroke outboard motor involves flushing the engine, stabilizing the fuel, changing the oil and filter, replacing lower unit gear oil, lubricating moving parts, checking the battery, protecting against corrosion, and storing the motor properly.
Do 4 stroke outboard motors need fogging oil?
Many modern 4-stroke outboard motors do not require fogging oil. However, always consult your owner’s manual and follow the manufacturer’s recommendations for your specific engine model.
Can I leave fuel in my outboard motor over winter?
Yes. Adding a quality marine fuel stabilizer and running the engine long enough to circulate the treated fuel throughout the system can help preserve fuel quality during storage.
How much does it cost to winterize a 4 stroke outboard motor?
DIY winterization generally costs between $30 and $150 in supplies. Professional winterization services typically range from $150 to $500 or more depending on the motor size and service requirements.
What happens if I don’t winterize my outboard motor?
Failing to winterize your motor can result in fuel degradation, corrosion, freezing damage, battery problems, difficult spring startups, and potentially expensive repairs.
How often should I winterize my outboard motor?
Winterization should be performed once each year before long-term storage or before temperatures begin approaching freezing conditions.
Can I winterize my outboard motor myself?
Yes. Most boat owners can perform basic winterization with the proper tools, supplies, and manufacturer guidelines. However, professional assistance may be beneficial for complex maintenance needs.
Is winterization necessary in warm climates?
Yes. Even in warmer climates, fuel stabilization, lubrication, corrosion prevention, and proper storage procedures help protect the engine during extended periods of inactivity.